Vita
  Custom made shoes women
  Custom made shoes men
  Custom made sports shoes
  Special shoes
  Shoe repair
  Press reports
  Gallery
  Shoe care
  Manucaturing custom made shoes
  Profile of a custom made shoe
  Links
  Museum
  Leather Care Seminars
  Legal notice
   

Manucaturing custom made shoes

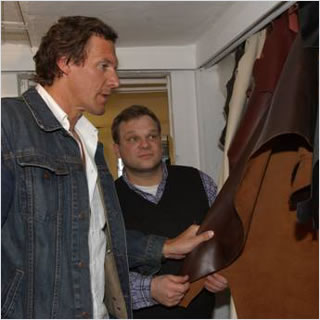
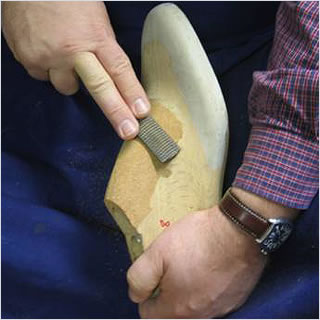
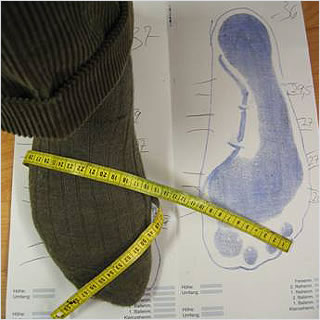
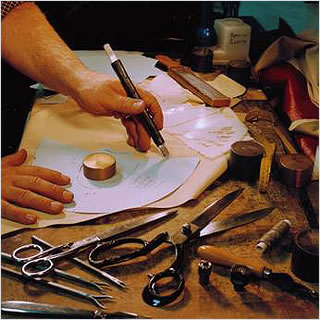
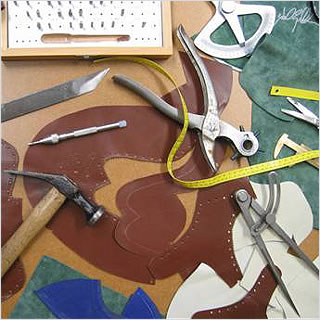
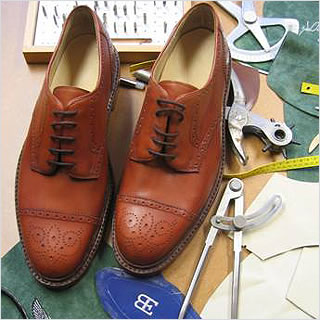
The secret of manufacturing custom made shoes has starts long before the first cut or stitch. After the customer has chosen shoe model and leather (ill.1), the precise measurements of the feet are taken. (ill.2). The blueprint of the foot is checked if there are any signs of a stressed foot. This knowledge is then used for the footbed which is shaped into the custom last made of beechwood. The measurements which were taken with the tapeline at different points, are converted into a functional (ill.3). It is put very much weight on the customer‘s „diction of shape“.

Afterwards several test shoes are made over the last. The customer wears his final pair of test shoes for about 14 days. Then we cut open the test shoes and recognize, where we have to make some improvements on the last.

Abb.1
   
Abb.2 Abb.3
   

When the last is put into perfect shape, the lining and the upper (ill.4) are cut out. Depending on the shoe model the upper possibly gets openworks (ill.5) and a toothed seam.
This is a very elaborate and important work step. Very much experience in cutting is necessary in order to bring the direction of the leather‘s structure into accordance with the shoe.

The individual parts are then seamed up to get the upper (ill.6).

  Abb.4
Abb.5 Abb.6
   

In order to later fix the upper you need the insole. It‘s made out of the cow‘s neck and is about 4 mm thick. A gutter is carved out of the insole. On the ground of the gutter some fine holes are stitched with a shoemaker‘s awl. So later the seam can be taken. (ill.7).

Before the upper ist put over the last, inside toe cap and inside counter are placed into the upper. They are made from a 2,5 mm neck leather and are used wet. (ill.8)

   
Abb.7 Abb.8
   

The upper is then clipped over the last (ill.9).

Carefully fold after fold is taken over across the last‘s edge. The welt is an especially strong leather strip. It‘s sewn up with the insole. The shoemaker stitches with his awl through lining, rear cap and upper into the welt and all parts are combined with a pitched thread. (ill.10).

   
Abb.9 Abb.10
   
That‘s the all decisive seam. It gives the shoe its unmatched durability and makes it very hardwearing. On the bottom of the insole cork grit is applied. That leads to a good insulation and a perfect foot climate. In order to later have a stable shoe joint a strong steel spring is integrated. (ill.11). The outsole or midsole is double stitched, that means attached to the welt.
  Abb.11
   
Abb.12 Abb.13

The heel is build leather layer by leather layer and is for a better durability fixed with wooden nails which swell when they get humid and so strenghten the connections. (ill.13).

After all soles and heel layers have been built, the bottom of the shoe is grinded into form and colored with the appropriate sole color. (ill.14).

After the sole color has dried, wax is put on outside of the sole, which is burnt into the pores of the sole branding iron. That seals the pores and water-repellent effect. (ill.15).

   
Abb.14 Abb.15
   

To make the sole look finer, small brass nails are nailed into the joint of the shoe. These nails don‘t have any function, they are just ornament. After 20 hours of hard work a pair of custom made shoes is finished. They fit perfectly just one person.

But custom made shoes have to be broken in for at least three weeks and you don‘t want anything else for your feet.

  Abb.16